Short notes for people who already use Indigo. The old user's guide links inside those articles are no longer available.
Send a command on a timer
Indigo can run a script that sends commands to the connected session and can watch or change data as it arrives. This example sends the date command every 10 seconds.
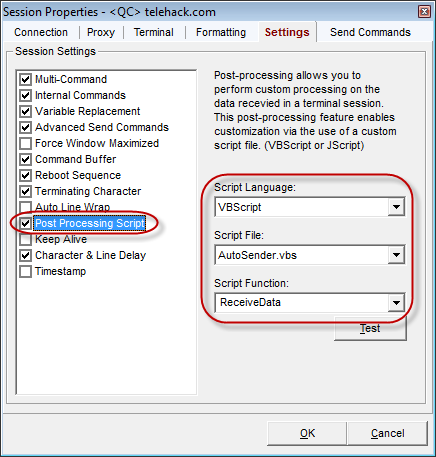
In Session Properties, open the Settings tab, check Post Processing Script, and choose VBScript, the AutoSender.vbs file, and the ReceiveData function.
When the connection opens, the script queues date to go out in 10 seconds. Each time that command is sent, it queues the next one with another 10 second delay. Download AutoSender.vbs.
'///////////////////////////////////////////////////////////
'///////////////////////////////////////////////////////////
'//
'// Indigo Terminal Emulator
'// Timed Command Automation Script
'// Version 1.0
'//
'// shadeBlue Software
'// http://www.shadeblue.com
'//
'///////////////////////////////////////////////////////////
'///////////////////////////////////////////////////////////

'// declare program constants
Const MY_COMMAND = "date"

'//------------------------------------
'// Host connection established
'//------------------------------------
Sub Host_Connected()

    '// say hello
    Host.Post vbCrLf
    Host.Post "--------------------------------------------------------------------" & vbCrLf
    Host.Post "SCRIPT STARTED" & vbCrLf
    Host.Post "--------------------------------------------------------------------" & vbCrLf

    '// enqueue first command
    EnqueueCommand

End Sub

'//------------------------------------
'// Host connection disconnected
'//------------------------------------
Sub Host_Disconnected()

    '// clear host command queue
    Host.Queue.Clear

    '// say goodbye
    Host.Post vbCrLf
    Host.Post "--------------------------------------------------------------------" & vbCrLf
    Host.Post "SCRIPT SUSPENDED" & vbCrLf
    Host.Post "--------------------------------------------------------------------" & vbCrLf

End Sub

'//------------------------------------
'// Host attempting to send data command
'// (Return the command to process)
'//------------------------------------
Function Host_Send(Byval command)

    '// if we see our command issued, then we can enqueue the next cycle
    if (command = MY_COMMAND) then

        Host.Post "--------------------------------------------------------------------" & vbCrLf
        Host.Post "SCRIPT QUEUEING NEXT COMMAND" & vbCrLf
        Host.Post "--------------------------------------------------------------------" & vbCrLf

        EnqueueCommand

    end if

    '// transmit unmodified command
    Host_Send = command

End Function

'//-----------------------------------------------------------
'// This function queues the next command
'//-----------------------------------------------------------
Function EnqueueCommand()

    '// clear host command queue
    Host.Queue.Clear

    '// wait 10 seconds before sending command
    Host.Queue.Add MY_COMMAND, 10000

    '// begin processing the queued instructions
    Host.Queue.Send

End Function

'//-----------------------------------------------------------
'// This function is needed to configure the Indigo session
'// scripting options. This is effectively a NO-OP function
'//-----------------------------------------------------------
Function ReceiveData(ByVal sData)

    '// don't do anything here
    '// just return the data received
    ReceiveData = sData

End Function
Broadcast a command to every session
Version 3 can send what you type in one session to every other open, connected session. That includes a sequence of commands or a repeating command.
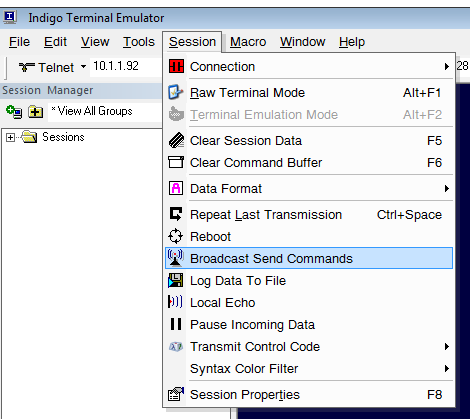
With a session window open, choose Session, then Broadcast Commands.
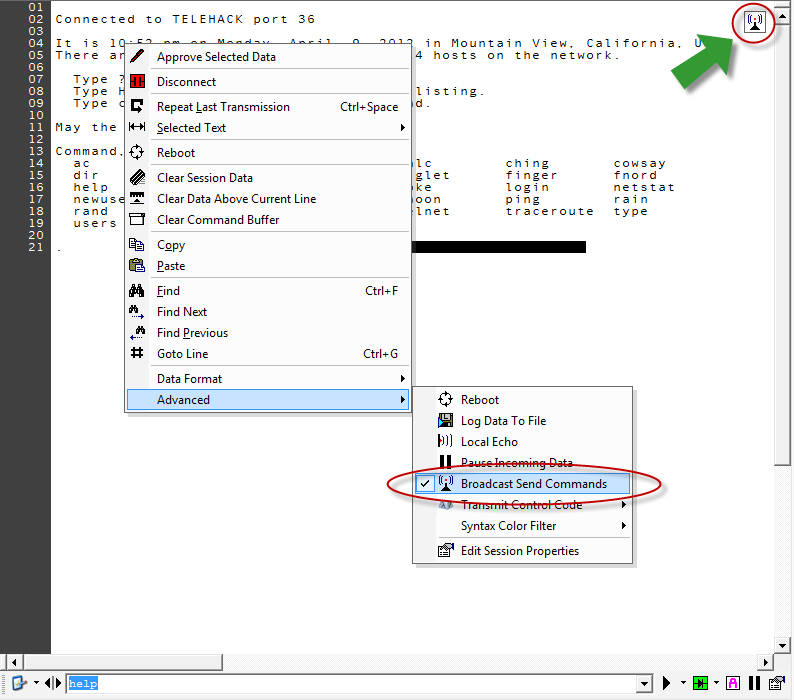
A broadcasting session shows this icon in the upper right of the window. Click the icon to turn broadcasting off.
The same command is on the right-click menu in the session window.
Send selected text
Version 3 can take text you select in the data window and send it to another place in Indigo, or back to the connected session.
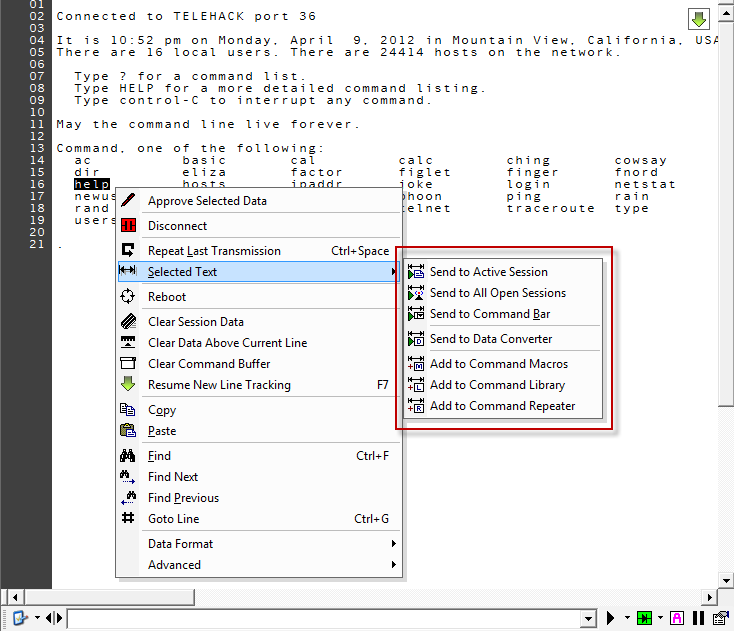
Select the text, right-click, and open Selected Text. Then pick where the text should go.
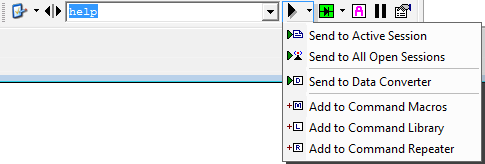
The command bar has the same kind of menu for text sitting in the command bar.
Timestamp each received line
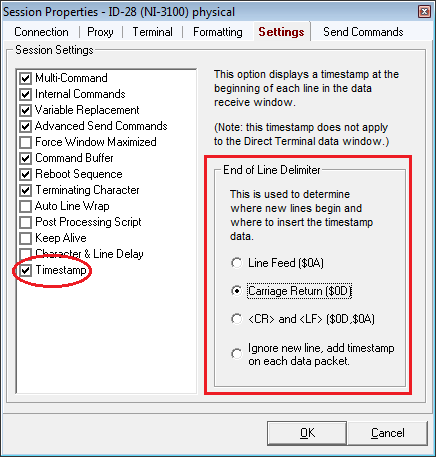
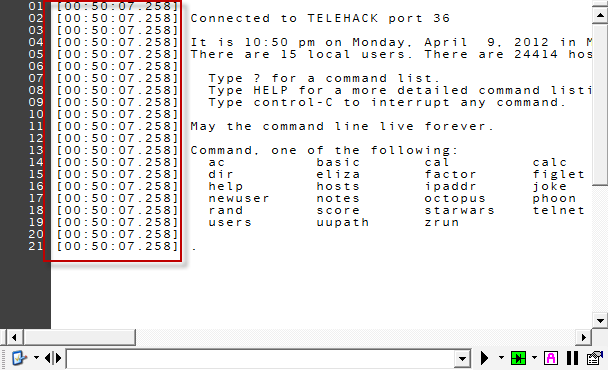
Version 3 can stamp each line of data in the session window. Edit the session properties, open the Settings tab, turn on the timestamp option, and choose the line ending that marks each line.
TCP socket listener
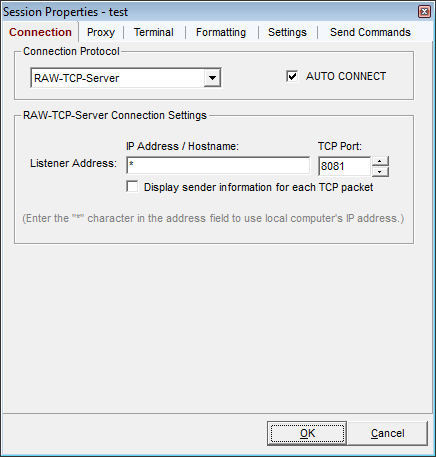
Professional Edition can listen for a TCP connection on an address and port you choose. Indigo accepts the inbound connection, and then the session works like any other Indigo session.
UDP communications
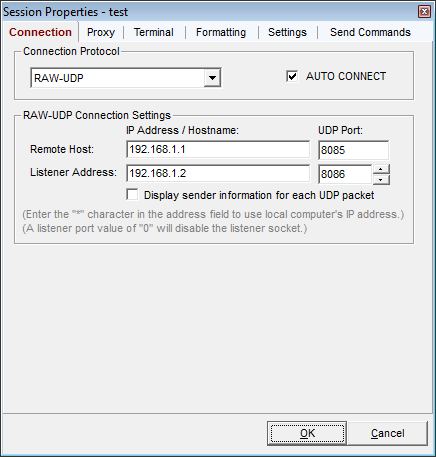
Professional Edition can send UDP to a host and port you choose, and it can listen on a separate UDP port at the same time.
Serial pinouts and loopback wiring
A National Instruments tutorial lists DE-9, DB-25, and RJ50 loopback diagrams. The pairs below are the ones that tutorial lists. The diagrams stay on that page: NI serial loopback tutorial (opens in a new tab).
DE-9 (DB9)
RS-232 data loopback: connect pin 2 to pin 3.
RS-232 hardware flow control, in addition to the data pair: connect pin 4 to pin 6 (DTR/DSR) and pin 7 to pin 8 (RTS/CTS).
RS-422/485 data loopback: connect pin 4 to pin 8, and pin 5 to pin 9.
RS-422/485 hardware flow control, in addition to those pairs: connect pin 2 to pin 3, and pin 6 to pin 7. Both pairs are needed because those signals are differential.
DB-25
Most DB-25 pins are unused. RS-232, RS-422, and RS-485 use nine of them.
RS-232 data loopback: connect pin 2 to pin 3.
RS-232 hardware flow control, in addition to the data pair: connect pin 4 to pin 5, and pin 6 to pin 20.
RS-422/485: connect pin 5 to pin 20, and pin 7 to pin 22. The tutorial uses those same two pairs for the basic loopback and for the flow-control loopback.
10P10C (RJ50)
The tutorial says this plug is common on National Instruments four-port serial interfaces, which ship with 10P10C to DE-9 converter cables. It recommends against looping the 10P10C plug back on itself, because the pins are close together, and says to use a 10P10C to DE-9 converter (NI part 192190-01) and then the DE-9 pairs above.
RS-232 DB9 pinout
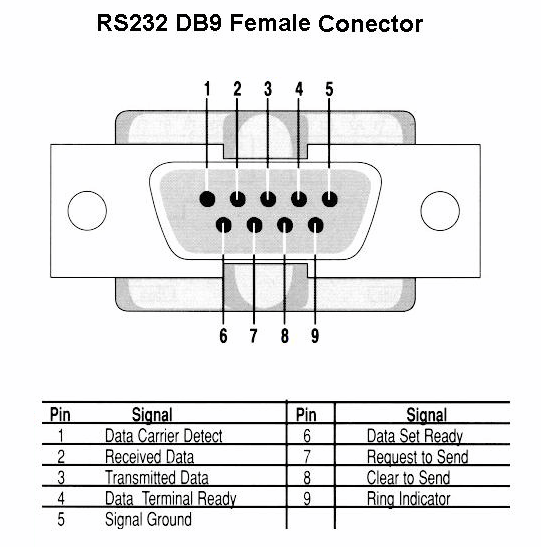
Pin numbers for an RS-232 DB9 female connector, for anyone building a serial cable.
RS-232 DB9 female connector signals
Pin
Signal
Pin
Signal
1
Data Carrier Detect
6
Data Set Ready
2
Received Data
7
Request to Send
3
Transmitted Data
8
Clear to Send
4
Data Terminal Ready
9
Ring Indicator
5
Signal Ground
Change a COM port number in Windows
These steps depend on the version of Windows. The screenshots are from an older Windows desktop.
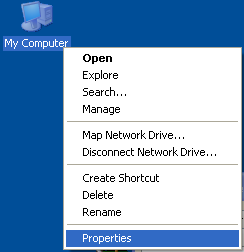
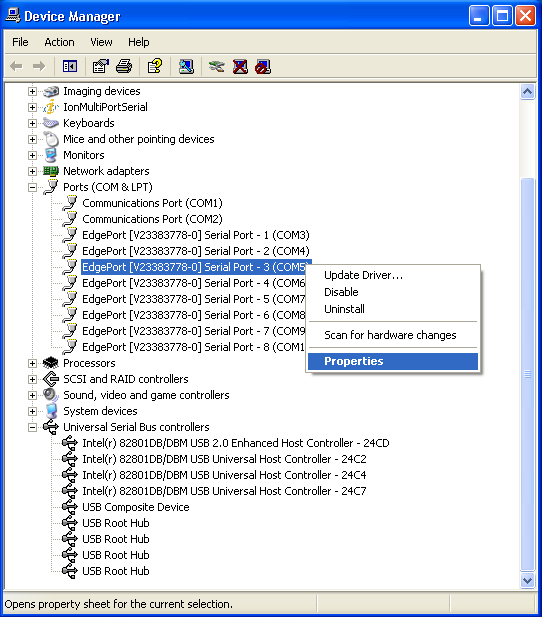
Right-click the My Computer icon on the desktop.
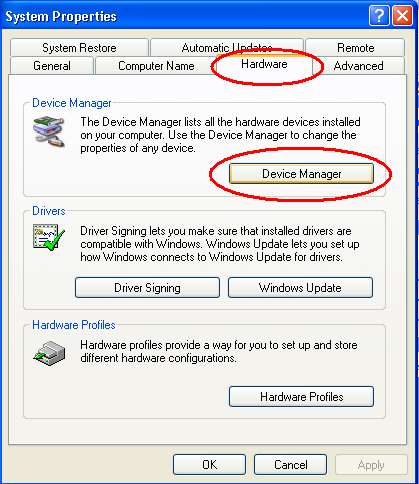
Open the Hardware tab and press Device Manager.
Expand Ports (COM & LPT), right-click the COM port to change, and choose Properties.
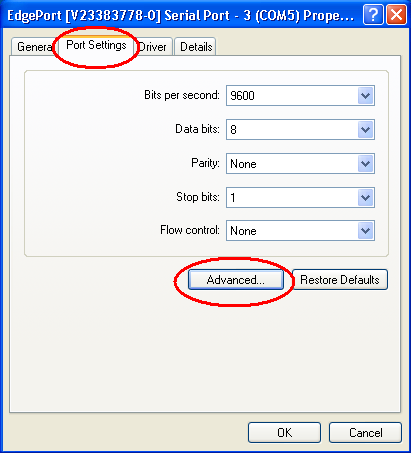
Open the Port Settings tab and press Advanced.
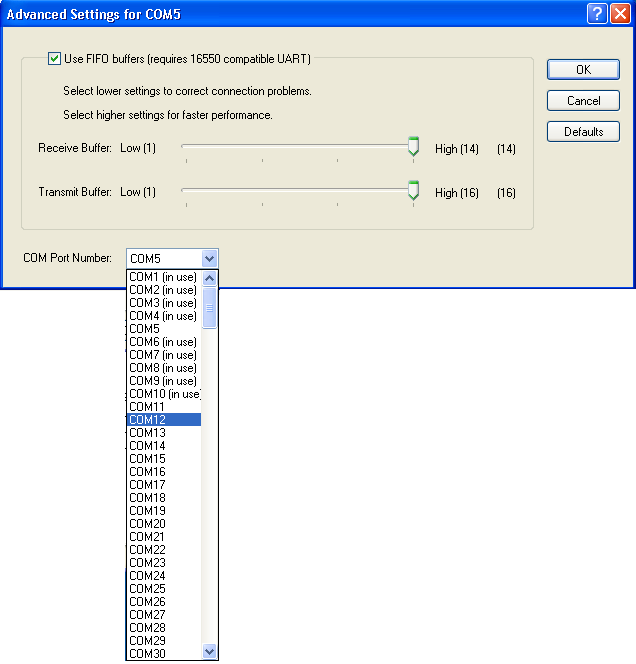
Choose an unused COM port number to assign to this port.
Open sessions when Indigo starts
Version 3 can open chosen sessions when the program starts. Right-click a session in the session manager and choose Auto-Load.
An older version of this note also described a command-line shortcut and an "open the last session" preference. Those instructions were withdrawn, so they are not repeated here.
Repeat the last command
Starting in version 2.0.108, Indigo can resend the last command that went to the connected session.
Press Ctrl+Space, or right-click the data window and choose Repeat Last Transmission.
Filter out null bytes
Starting in version 2.0.106, a session can drop every null byte (0x00) from incoming data. The last published build is on the download page.
In Session Properties, on the Formatting tab, check Filter Out <Null> (0x00) bytes. Checked, Indigo strips those bytes as data arrives.
Send several commands from one macro
A macro, or any other field that sends a command string, can hold more than one command. Separate each command with a pipe character.
1|2
one|two|three|four|five
To try it, type the whole string in the command bar at the bottom of the session.
To pause between commands, insert the internal pause command. The form is :p:0000, where 0000 is the delay in milliseconds.